Your cart is currently empty!
Category: Daily Goody
The Daily Goody is daily tip, fact, or lesson on podcast production. You can receive it daily or a weekly roundup with our dedicated newsletter.
-

Is It Necessary To Use Compression on Your Voice When Livestreaming?
If you want professional sounding audio, the answer is Yes. But without compression you can still sound good by using good microphone technique.
How/where to use compression when livestreaming:
- Some streaming software, like OBS, contain audio processors (including compression) that you can use to process your voice in real-time when Livestreaming.
- Some microphones, like the Shure MV7, have real-time compression built into them, which you can turn on and adjust via the microphones app.
- You can plug your microphone into a hardware channel strip, like the dbx 286s, to compress your voice in real-time when Livestreaming.
- You can use routing software (like Audio Hijack, Sound Syphon or Voice Meeter, etc.) to add a compressor to your voice in real-time when Livestreaming.
Have you ever used compression when Livestreaming? Comment below with your juicy details 😉
Want to receive the Daily Goody in your email, daily or weekly? Subscribe free here.
And please keep in mind, the Daily Goody is only a tiny little tip, fact or lesson everyday. Please don’t expect any of these posts to be long, earth-shattering masterpieces that instantly answer every single question you can think of and completely transform you into a world class podcast engineer. “Little by little, a little becomes a lot.”
-

Is Recording Audio in 24-bit _REALLY_ That Much Better Than 16-bit??
Yes, 24-bit audio recordings contain 256 times more detail and resolution (!!!) than 16-bit audio. 24-bit audio can record 16,777,216 discreet values for loudness levels (or a dynamic range of 144 dB), versus 16-bit audio which can represent 65,536 discrete values for the loudness levels (or a dynamic range of 96 dB).
However, in terms of recording audio of individuals speaking on podcasts, it’s perfectly OK to record in 16-bit.
NOTE: Audio processors and plugins (like de-noise, de-reverb, etc.) can do a much better job when you feed them 24-bit audio because it gives them lots more information to work with.
QUESTION for you — do you record your raw audio in 16-bit or 24-bit? Comment below.
Want to receive the Daily Goody in your email, daily or weekly? Subscribe free here.
And please keep in mind, the Daily Goody is only a tiny little tip, fact or lesson everyday. Please don’t expect any of these posts to be long, earth-shattering masterpieces that instantly answer every single question you can think of and completely transform you into a world class podcast engineer. “Little by little, a little becomes a lot.”
-
Do You Edit Podcasts While Standing up or Sitting Down?
Do you edit podcasts while standing up or sitting down?
I always produce audio while sitting down, but someday I want to buy a standing desk so I can get up off my ***. HA!
Comment below with your posture preferences!
Want to receive the Daily Goody in your email, daily or weekly? Subscribe free here.
And please keep in mind, the Daily Goody is only a tiny little tip, fact or lesson everyday. Please don’t expect any of these posts to be long, earth-shattering masterpieces that instantly answer every single question you can think of and completely transform you into a world class podcast engineer. “Little by little, a little becomes a lot.”
-
Be Sure To Use Stereo Versions of Plugins on Stereo Tracks *IF…
Be sure to use stereo versions of plugins on stereo tracks IF you want to hear the stereo track in stereo. Because when you use a mono plugin on a stereo track, you will only hear one side of the stereo track (usually the left, I believe).
Want to receive the Daily Goody in your email, daily or weekly? Subscribe free here.
And please keep in mind, the Daily Goody is only a tiny little tip, fact or lesson everyday. Please don’t expect any of these posts to be long, earth-shattering masterpieces that instantly answer every single question you can think of and completely transform you into a world class podcast engineer. “Little by little, a little becomes a lot.”
-
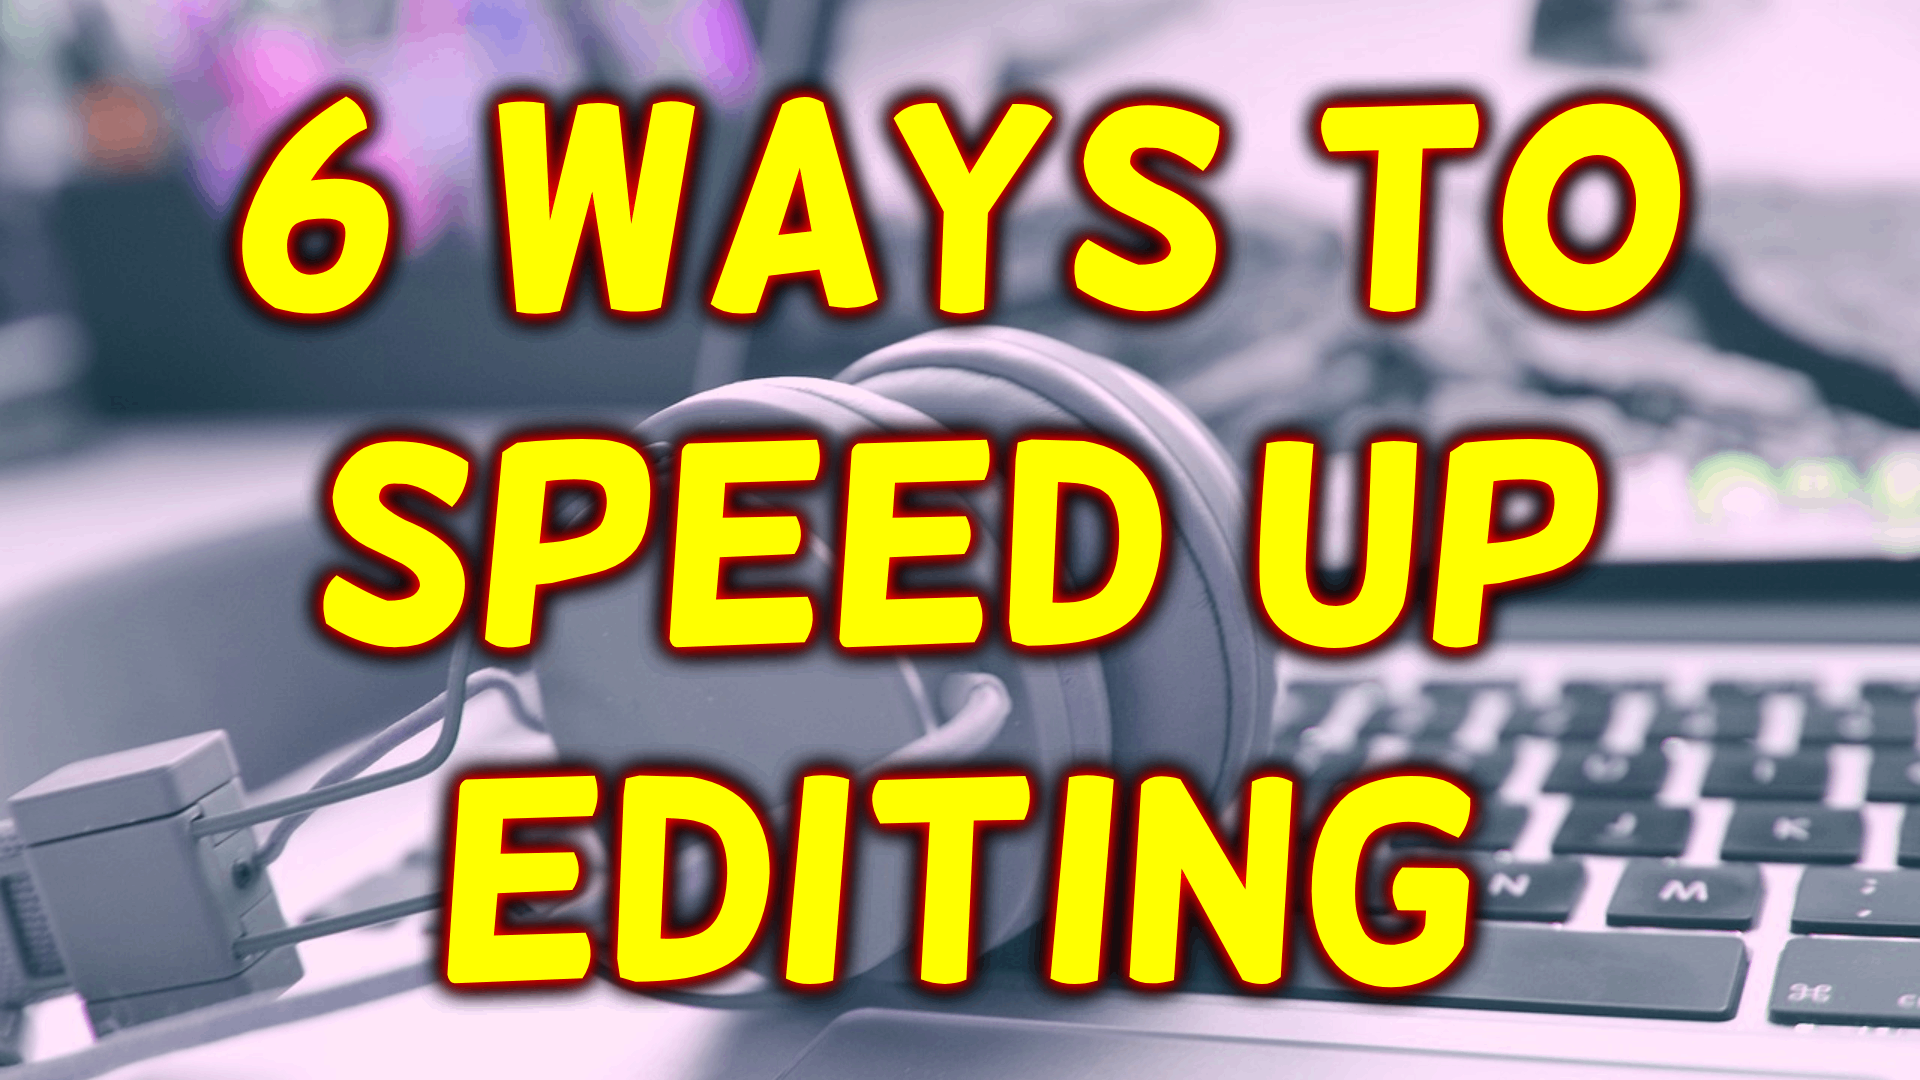
6 Ways To Speed Up Your Podcast Editing Process
Without sacrificing the quality of your edits, here are 6 ways you can speed up significantly and edit podcast audio MUCH faster:
- Use keyboard shortcuts for your most used commands.
- Listen to and verify every edit immediately after making it so when you get to the end of the file you’re done.
- Don’t even attempt super-tricky edits (like removing the umm from “and-umm”), unless you’re getting paid extra to remove literally every single umm, etc.
- Speed up playback to 1.5x or more. Sadly, some applications don’t have this functionality.
- If you’re editing someone else’s podcast and they regularly use lots of filler words and generally have poor presentation skills, work with them (gently) to overcome these deficiencies.
- Get in the mindset and habit of zipping through your editing quickly while, of course, always maintaining the highest quality editing.
Do you have any other ideas to add to the list? Comment below 🙂
Want to receive the Daily Goody in your email, daily or weekly? Subscribe free here.
And please keep in mind, the Daily Goody is only a tiny little tip, fact or lesson everyday. Please don’t expect any of these posts to be long, earth-shattering masterpieces that instantly answer every single question you can think of and completely transform you into a world class podcast engineer. “Little by little, a little becomes a lot.”
-
How To Get Amazing Deals on Audio Plugins
Most audio plugins go on sale from time to time, so the way to get the best deals on awesome plugins is to monitor their prices and wait until they go on sale. The easiest way to monitor prices is to get on the email lists of all the plugin companies you want to monitor, and they will let you know when their plugins are on sale.
This may seem like a considerable amount of work but in less than a minute each day you can scan those emails for deals.
And sometimes the sales are really amazing like 80-90% off!
Want to receive the Daily Goody in your email, daily or weekly? Subscribe free here.
And please keep in mind, the Daily Goody is only a tiny little tip, fact or lesson everyday. Please don’t expect any of these posts to be long, earth-shattering masterpieces that instantly answer every single question you can think of and completely transform you into a world class podcast engineer. “Little by little, a little becomes a lot.”
-
What Is Microphone Technique and Why Is It Important and Helpful When Recording Podcasts?
Microphone technique is art of managing your proximity to a microphone.
Bad microphone technique results in a sound and audio signal level that is:
- Wildly dynamic (oscillating between sometimes extremely loud and sometimes extremely quiet)
- Very unpleasant for listeners to experience (oscillating between painfully loud and literally inaudible)
- Prone to clipping and distortion
- Much more difficult to process in post-production
Good microphone technique avoids all the issues listed above and provides all listeners with a good listening experience during which they can focus on the content and not be continually distracted by audio issues.
How to have good microphone technique:
- Consciously establish a good default distance (3-6 inches) from the microphone for when you’re speaking at normal volume, and stay there when speaking at normal volume.
- If and when you raise the volume of your voice considerably, move your mouth further away from the microphone (by leaning back a bit or turning away slightly).
- If and when you lower the volume of your voice, move your mouth closer to the microphone. (for softer, more intimate moments and whispering, etc.)
When you first start doing this, it will feel incredibly awkward and difficult, but very soon you will develop the habit of good microphone technique and you’ll never have to consciously think about it again!
How good is your microphone technique? Comment below.
Want to receive the Daily Goody in your email, daily or weekly? Subscribe free here.
And please keep in mind, the Daily Goody is only a tiny little tip, fact or lesson everyday. Please don’t expect any of these posts to be long, earth-shattering masterpieces that instantly answer every single question you can think of and completely transform you into a world class podcast engineer. “Little by little, a little becomes a lot.”
-

Fabfilter Pro-Q 3 – The Best EQ User Interface on the Market
In addition to being one of the best sounding EQ plugins available, and in addition to probably being the most feature-rich EQ plugin available, the Fabfilter Pro-Q 3‘s user interface experience is arguably the best around due to how visual, intuitive and helpful it is to the user.
Many podcast editors and producers absolutely LOVE to mix with their eyes as well as their ears, and the Pro-Q 3 literally shows all the frequency levels present in a sound. It even identifies specific frequencies that appear to be spiking above the rest, showing you exactly where and how much you may want to attenuate.
It’s not cheap (~$169), but overall it’s arguably the best EQ available in the world today, and the majority of audio professionals probably concur with this assessment/opinion.
Here’s an overview video from Fabfilter themselves: Introduction to FabFilter Pro-Q 3
You can get a 30-day free trial HERE.
If you already use this plugin, how much do you LOVE IT?!?! Right?
Want to receive the Daily Goody in your email, daily or weekly? Subscribe free here.
And please keep in mind, the Daily Goody is only a tiny little tip, fact or lesson everyday. Please don’t expect any of these posts to be long, earth-shattering masterpieces that instantly answer every single question you can think of and completely transform you into a world class podcast engineer. “Little by little, a little becomes a lot.”
-
Audio Adjectives and What Different Frequencies Like
Starting at 20:47 in episode 100 I demonstrate what various frequency ranges sound like and also discuss the audio “adjectives” associated with each range.
You’ll hear what these audio adjectives actually sound like: Big, Small, Boomy, Muddy, Boxy, Hollow, Midrangy, Biting, Presence, Clarity, Brightness, “Air,” and that telephone sound.
Let me know what you think.
Want to receive the Daily Goody in your email, daily or weekly? Subscribe free here.
And please keep in mind, the Daily Goody is only a tiny little tip, fact or lesson everyday. Please don’t expect any of these posts to be long, earth-shattering masterpieces that instantly answer every single question you can think of and completely transform you into a world class podcast engineer. “Little by little, a little becomes a lot.”
-
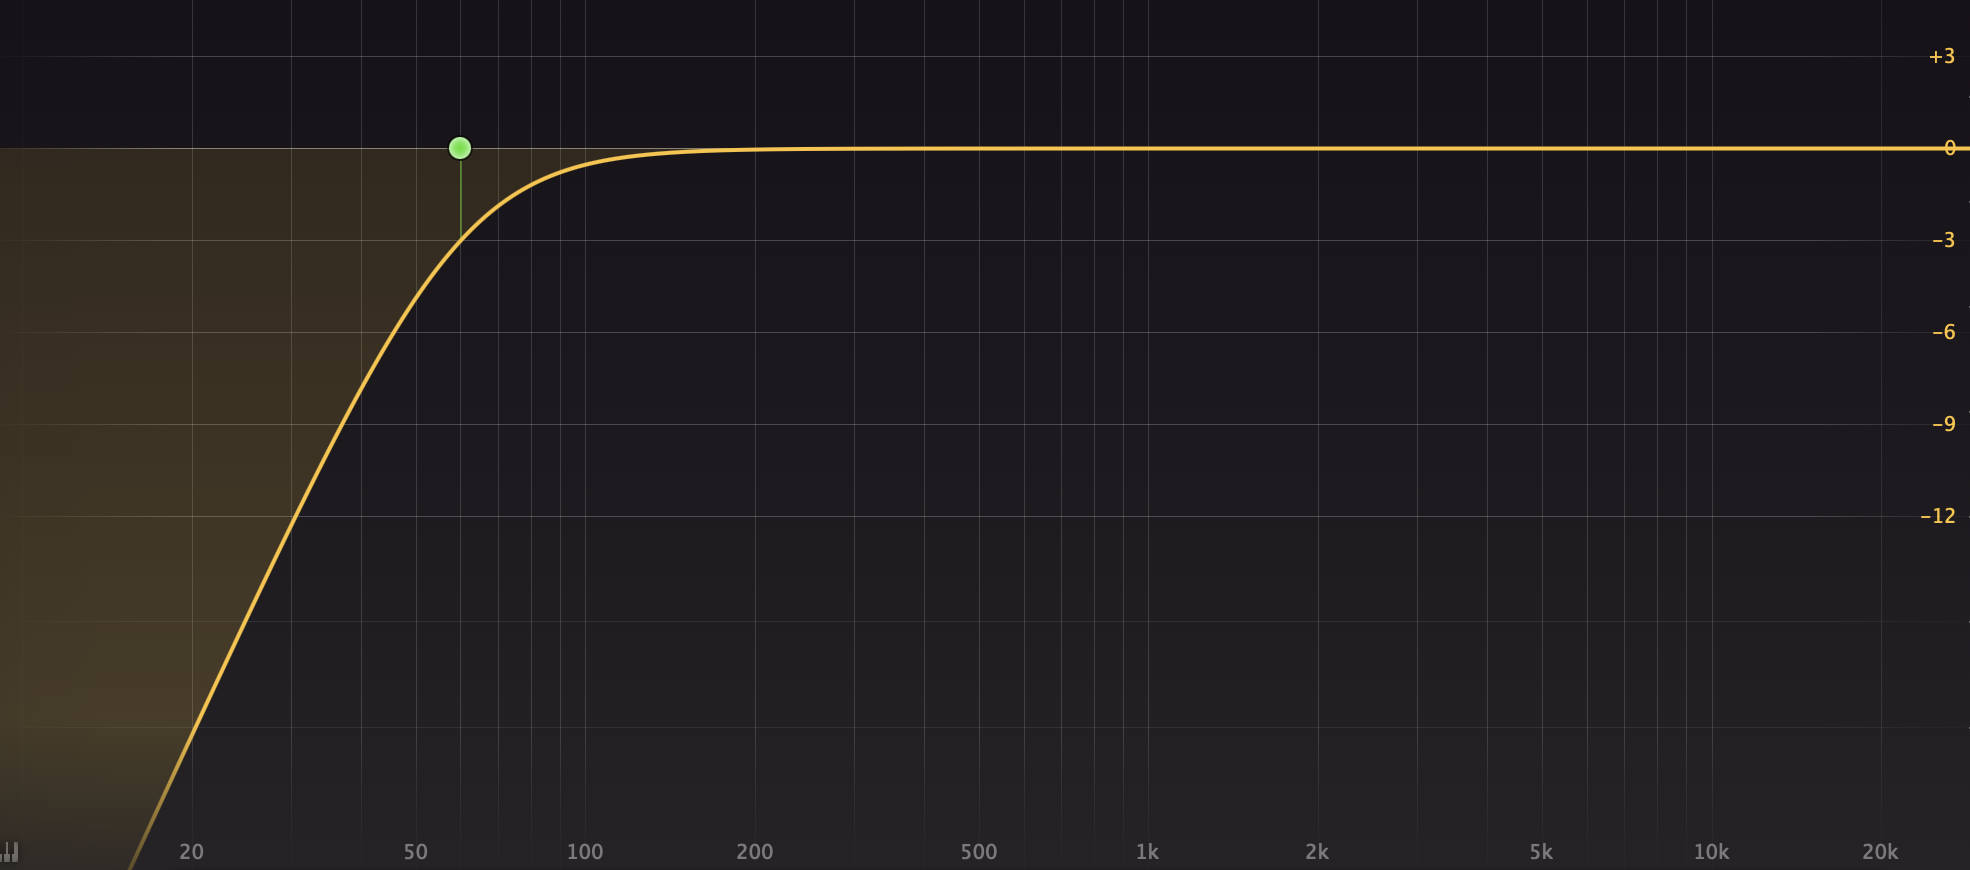
How To Use a High-pass Filter To Increase the Clarity of a Voice
The human voice is essentially a mid-range instrument, which means that most of its information resides in the mid-range of the frequency spectrum.
Humans can hear frequencies between around 20 Hz and 20,000 Hz, and the human voice does contain information along this entire spectrum, but the vast majority of the sound (including the most important frequencies for intelligibility) resides between around 250Hz and 4kHz.
A high-pass filter reduces the volume of the lowest frequencies (usually around 60-100Hz and below); it lets “high frequencies pass” through, hence the name high-pass filter. See the EQ curve above.
Basically, when you reduce the level of the lowest frequencies in any sound source, the midrange and higher frequencies will stand out more. Therefor, generally, using a high-pass filter will increase the clarity in a persons voice. Of course you can overdo it, so don’t overdo it! HA
Finally, the HOW TO:
Use a high-pass filter (available in most EQ plugins) to reduce the lowest frequencies. Common practice is to reduce from around 60Hz and below, but sometimes you will need to reduce more, say from 80-100Hz and below. Use your ears to determine how much you should remove to make the voice more clear. But don’t remove too much or else the voice will start sounding small, wimpy, thin and possibly harsh.
FYI, here’s a very helpful and thorough technical article titled Facts About Speech Intelligibility — https://www.dpamicrophones.com/mic-university/facts-about-speech-intelligibility
Did you find this helpful? Comment below 🙂
Want to receive the Daily Goody in your email, daily or weekly? Subscribe free here.
And please keep in mind, the Daily Goody is only a tiny little tip, fact or lesson everyday. Please don’t expect any of these posts to be long, earth-shattering masterpieces that instantly answer every single question you can think of and completely transform you into a world class podcast engineer. “Little by little, a little becomes a lot.”
-
Recording Multiple Voices on One Track
Don’t do it. That is all.
But seriously, don’t do it. Instead, record each podcast participant on their own track/file so that you have the ability in post-production to clean up, process and optimize each person’s voice separately.
Do you really want to hear Joe’s dog barking in the background when Joe is not even speaking, because it’s literally impossible to edit out the background dog barks while another participant is speaking??
The problem with recording multiple people together on one track (the same audio file) is that it’s impossible to clean up, process, and adjust each voice separately. There are some apps that attempt this feat but they don’t work very well, especially compared to the correct way to record professional audio (recording each participant on their own dedicated track/file).
Of course there may be times when you are forced, due to circumstances, to record multiple participants on the same track, but that should be the exception to the rule.
What are your thoughts?
Want to receive the Daily Goody in your email, daily or weekly? Subscribe free here.
And please keep in mind, the Daily Goody is only a tiny little tip, fact or lesson everyday. Please don’t expect any of these posts to be long, earth-shattering masterpieces that instantly answer every single question you can think of and completely transform you into a world class podcast engineer. “Little by little, a little becomes a lot.”
-

Repair Assistant in iZotope RX 10
RX 10’s Repair Assistant helps you clean up your raw audio.
The handy “Learn” button creates a custom module/processor chain for your audio. It scans your audio and suggests custom amounts of optimization in each of the following modules: De-ess, De-click, De-reverb, De-noise and De-clip. Then you can preview the sound of those suggested settings as well as increase or decrease the amount of each module to taste. Then, when everything sounds good to you, simply click Render.
Repair Assistant is included in the Standard and Advanced versions of RX 10.
NOTE: “Assistant’s” like these do a good job of getting you started in the right direction, but you still need to use your ears to determine what sounds good. The initial settings it suggests MAY be the perfect settings, but more than likely you’ll be able to make it sound way better by making some small adjustments to the suggested settings.
Are you the type of audio producer who uses Assistant’s like these? Comment below.
Want to receive the Daily Goody in your email, daily or weekly? Subscribe free here.
And please keep in mind, the Daily Goody is only a tiny little tip, fact or lesson everyday. Please don’t expect any of these posts to be long, earth-shattering masterpieces that instantly answer every single question you can think of and completely transform you into a world class podcast engineer. “Little by little, a little becomes a lot.”
-
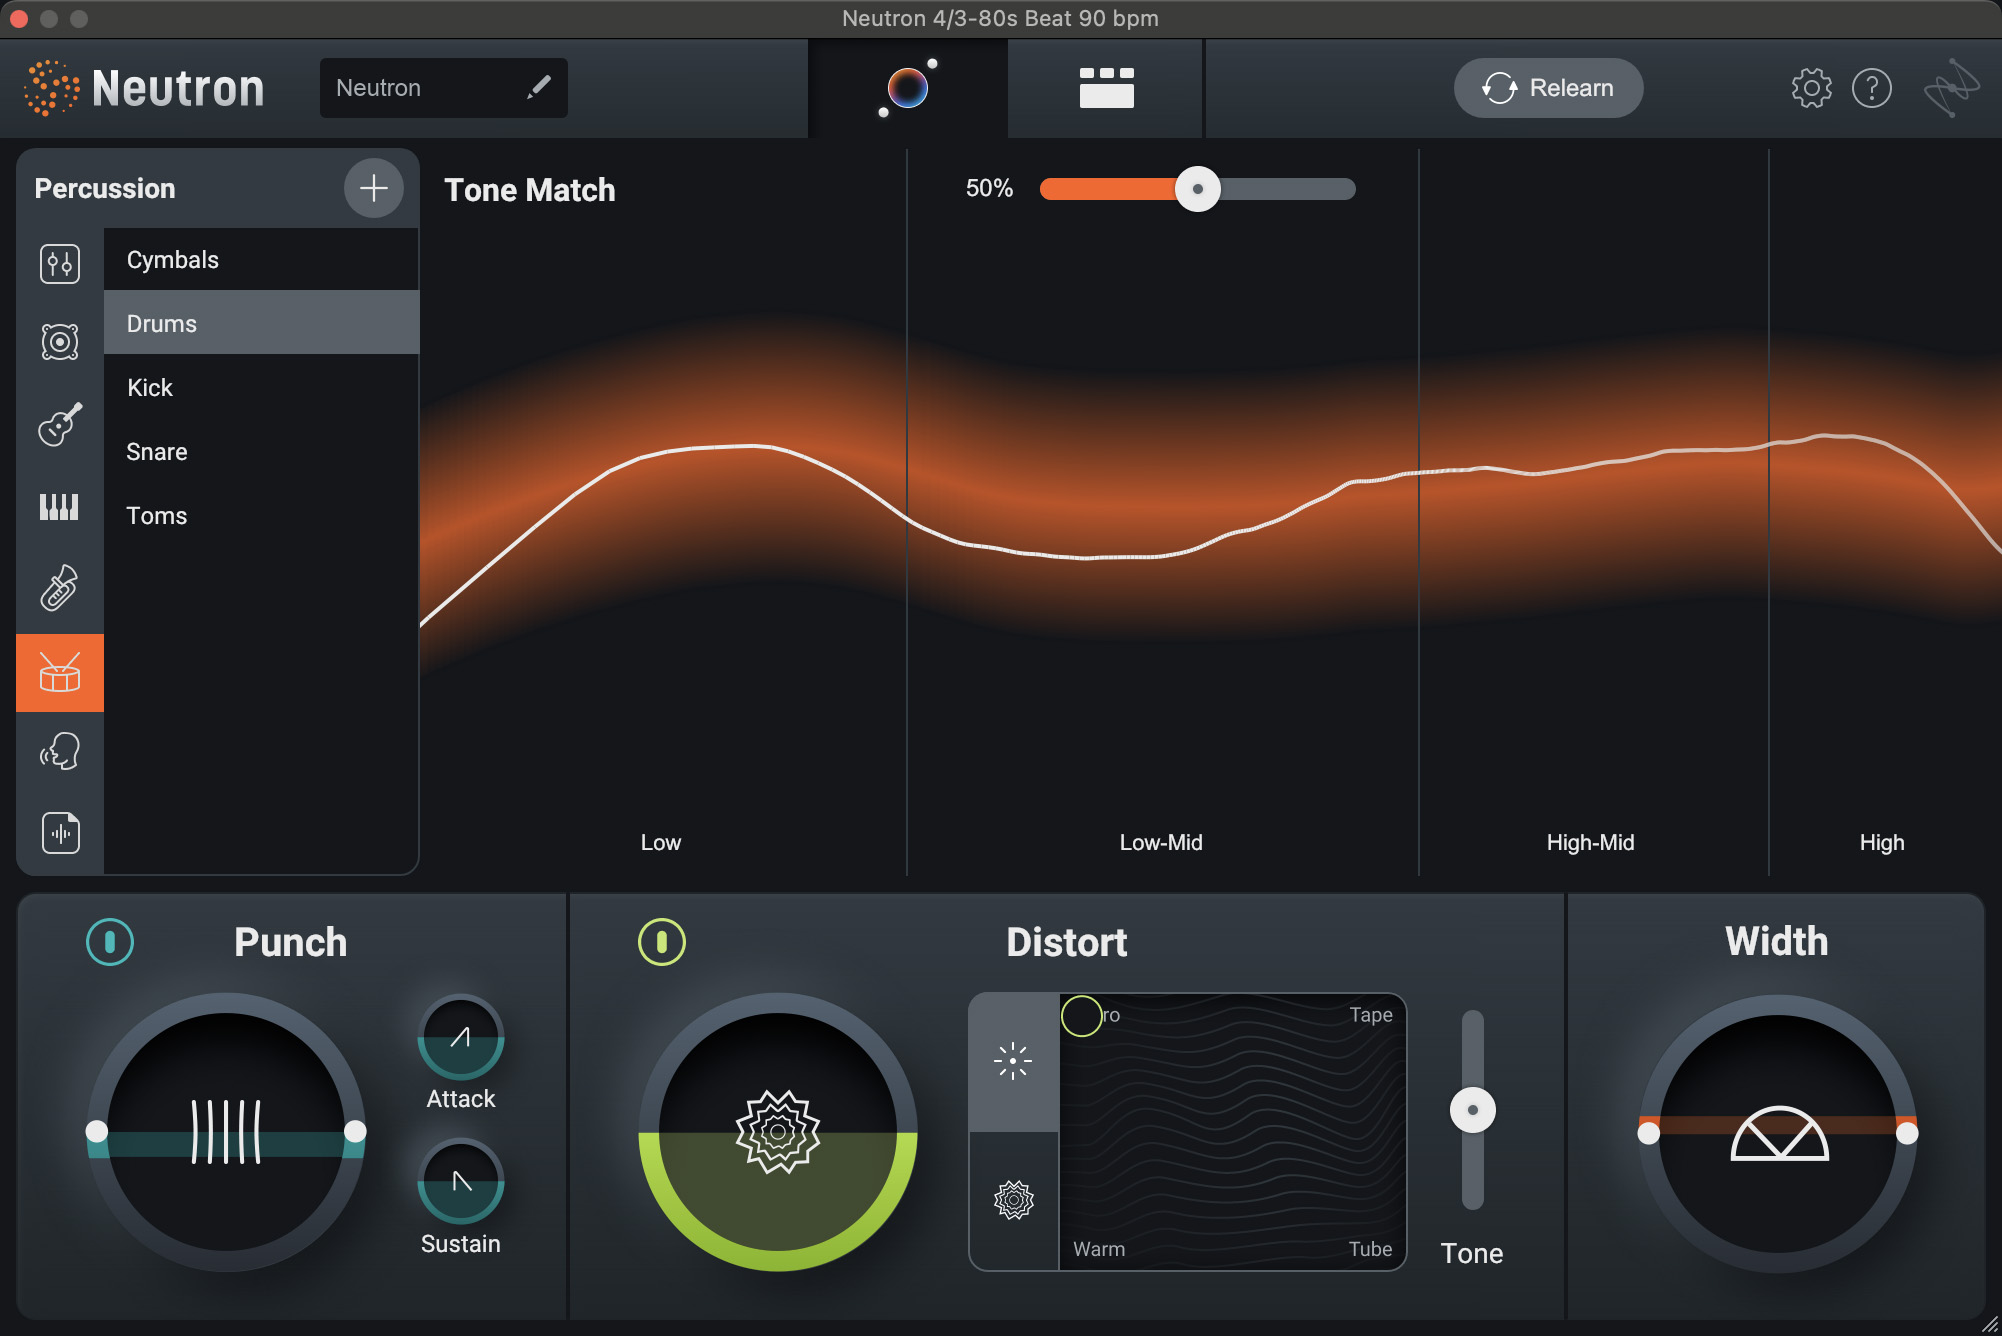
Neutron 4 from iZotope – A Channel Strip on Steroids
Neutron 4 has so many modules within it including EQ, compressor, gate, exciter, transient shaper, sculptor and unmask. This complete mixing suite costs around $399.
Probably the most helpful feature for podcasters, editors and producers is its Mix Assistant which evaluates your source audio and then dials in suggested EQ/compression/etc. settings to provide you with a good starting point which you can then tweak.
They offer a 10-day free trial, too.
Have you used Neutron before? Comment below.
Want to receive the Daily Goody in your email, daily or weekly? Subscribe free here.
And please keep in mind, the Daily Goody is only a tiny little tip, fact or lesson everyday. Please don’t expect any of these posts to be long, earth-shattering masterpieces that instantly answer every single question you can think of and completely transform you into a world class podcast engineer. “Little by little, a little becomes a lot.”
-

Top 3 Reasons Remote Podcast Guests Sound Bad, and How to Avoid All 3!
Remote podcast guests don’t know what they don’t know, so it’s our responsibility to soundcheck them and train them before starting the recording session to ensure we capture good audio from them.
Here are 3 common occurrences which ruin remote guests’ audio quality:
- Noisy Background — Fans, air conditioners, noisy kids in the next room, dogs barking and running around, phones ringing, open windows letting in the sound of lawnmower or cars driving by, etc. SOLUTION: Work with the guest to turn off or eliminate all these noises before starting recording.
- Making Extraneous Noises — Moving their microphone around, slapping things down on their desk, rearranging their desk mid-interview, moving their chair around, clicking a pen, tapping their foot, slamming their drink on their desk, wiping the dust off their computer, etc. SOLUTION: Explain to them that they have to BE ABSOLUTELY QUIET because they are now in a recording studio and their microphone will pick up all extraneous noises and ruin the sound of the podcast.
- Bad Microphone Technique — Drastically changing their proximity to their microphone (which drastically changes their volume level), having nasty plosives due to not having a pop filter/windscreen combined with speaking directly into the microphone, using their earbuds microphone and having it flap around and rub against clothing, etc. SOLUTION: Ask them to stay the same distance from the microphone at all times, ask them to speak “past” the microphone if they don’t have a pop filter/windscreen, ask them to make sure their earbuds mic doesn’t flap around.
BONUS NOTES:
- If they’re using a bad sounding microphone (for instance like an old school headset from 1998) and that’s the only microphone they have, you’ll have to rely on post-production to fix it as best you can.
- Make sure they have a solid Wifi connection; if not they should move closer to their router or modem. NOTE: Being hardwired with an ethernet cable is ALWAYS a million times better, but most guests won’t have that setup.
- If their computer is acting weird and they haven’t restarted it since 2007, have them restart it 😉
There’s a lot more to know regarding handling guests and soundchecking them properly but these ideas are a great start. We spend more than an hour in Podcast Engineering School going over this and much more in great depth.
Question for you — do you have any pre-recording rituals you do every time? Comment below.
Want to receive the Daily Goody in your email, daily or weekly? Subscribe free here.
And please keep in mind, the Daily Goody is only a tiny little tip, fact or lesson everyday. Please don’t expect any of these posts to be long, earth-shattering masterpieces that instantly answer every single question you can think of and completely transform you into a world class podcast engineer. “Little by little, a little becomes a lot.”
-

dbx 286s – Podcasting’s Most Popular Channel Strip Processor
The dbx 286s is a relatively inexpensive piece of audio gear that solves many issues for podcasters, Livestreamers and YouTubers.
Issues it solves:
- Low volume / not enough preamp gain (It has plenty of preamp gain to boost up gain-hungry microphones like the Shure SM7b, etc.)
- EQ issues like not enough clarity/high frequencies and not enough body/low frequencies (Its Enhancer increases the level, detail and definition of the high and low frequencies)
- Dynamic range issues like loud parts that peak/distort and low-volume parts that are super quiet/inaudible (via its classic dbx compression)
- Sibilance (Yes, it has a de-esser!)
- Background noise (via its Expander/Gate)
It usually sells for around $275.00
See all its technical specifications HERE.
FYI, in an upcoming episode of my Podcast Engineering Show my guest used a dbx 286s.
Do you use a dbx 286s? Comment below with your opinions about it. I’d love to know.
Want to receive the Daily Goody in your email, daily or weekly? Subscribe free here.
And please keep in mind, the Daily Goody is only a tiny little tip, fact or lesson everyday. Please don’t expect any of these posts to be long, earth-shattering masterpieces that instantly answer every single question you can think of and completely transform you into a world class podcast engineer. “Little by little, a little becomes a lot.”
-
The Purpose of Producing Good Sounding Audio and Why It’s Very Important
Want to receive the Daily Goody in your email, daily or weekly? Subscribe free here.
And please keep in mind, the Daily Goody is only a tiny little tip, fact or lesson everyday. Please don’t expect any of these posts to be long, earth-shattering masterpieces that instantly answer every single question you can think of and completely transform you into a world class podcast engineer. “Little by little, a little becomes a lot.”
-
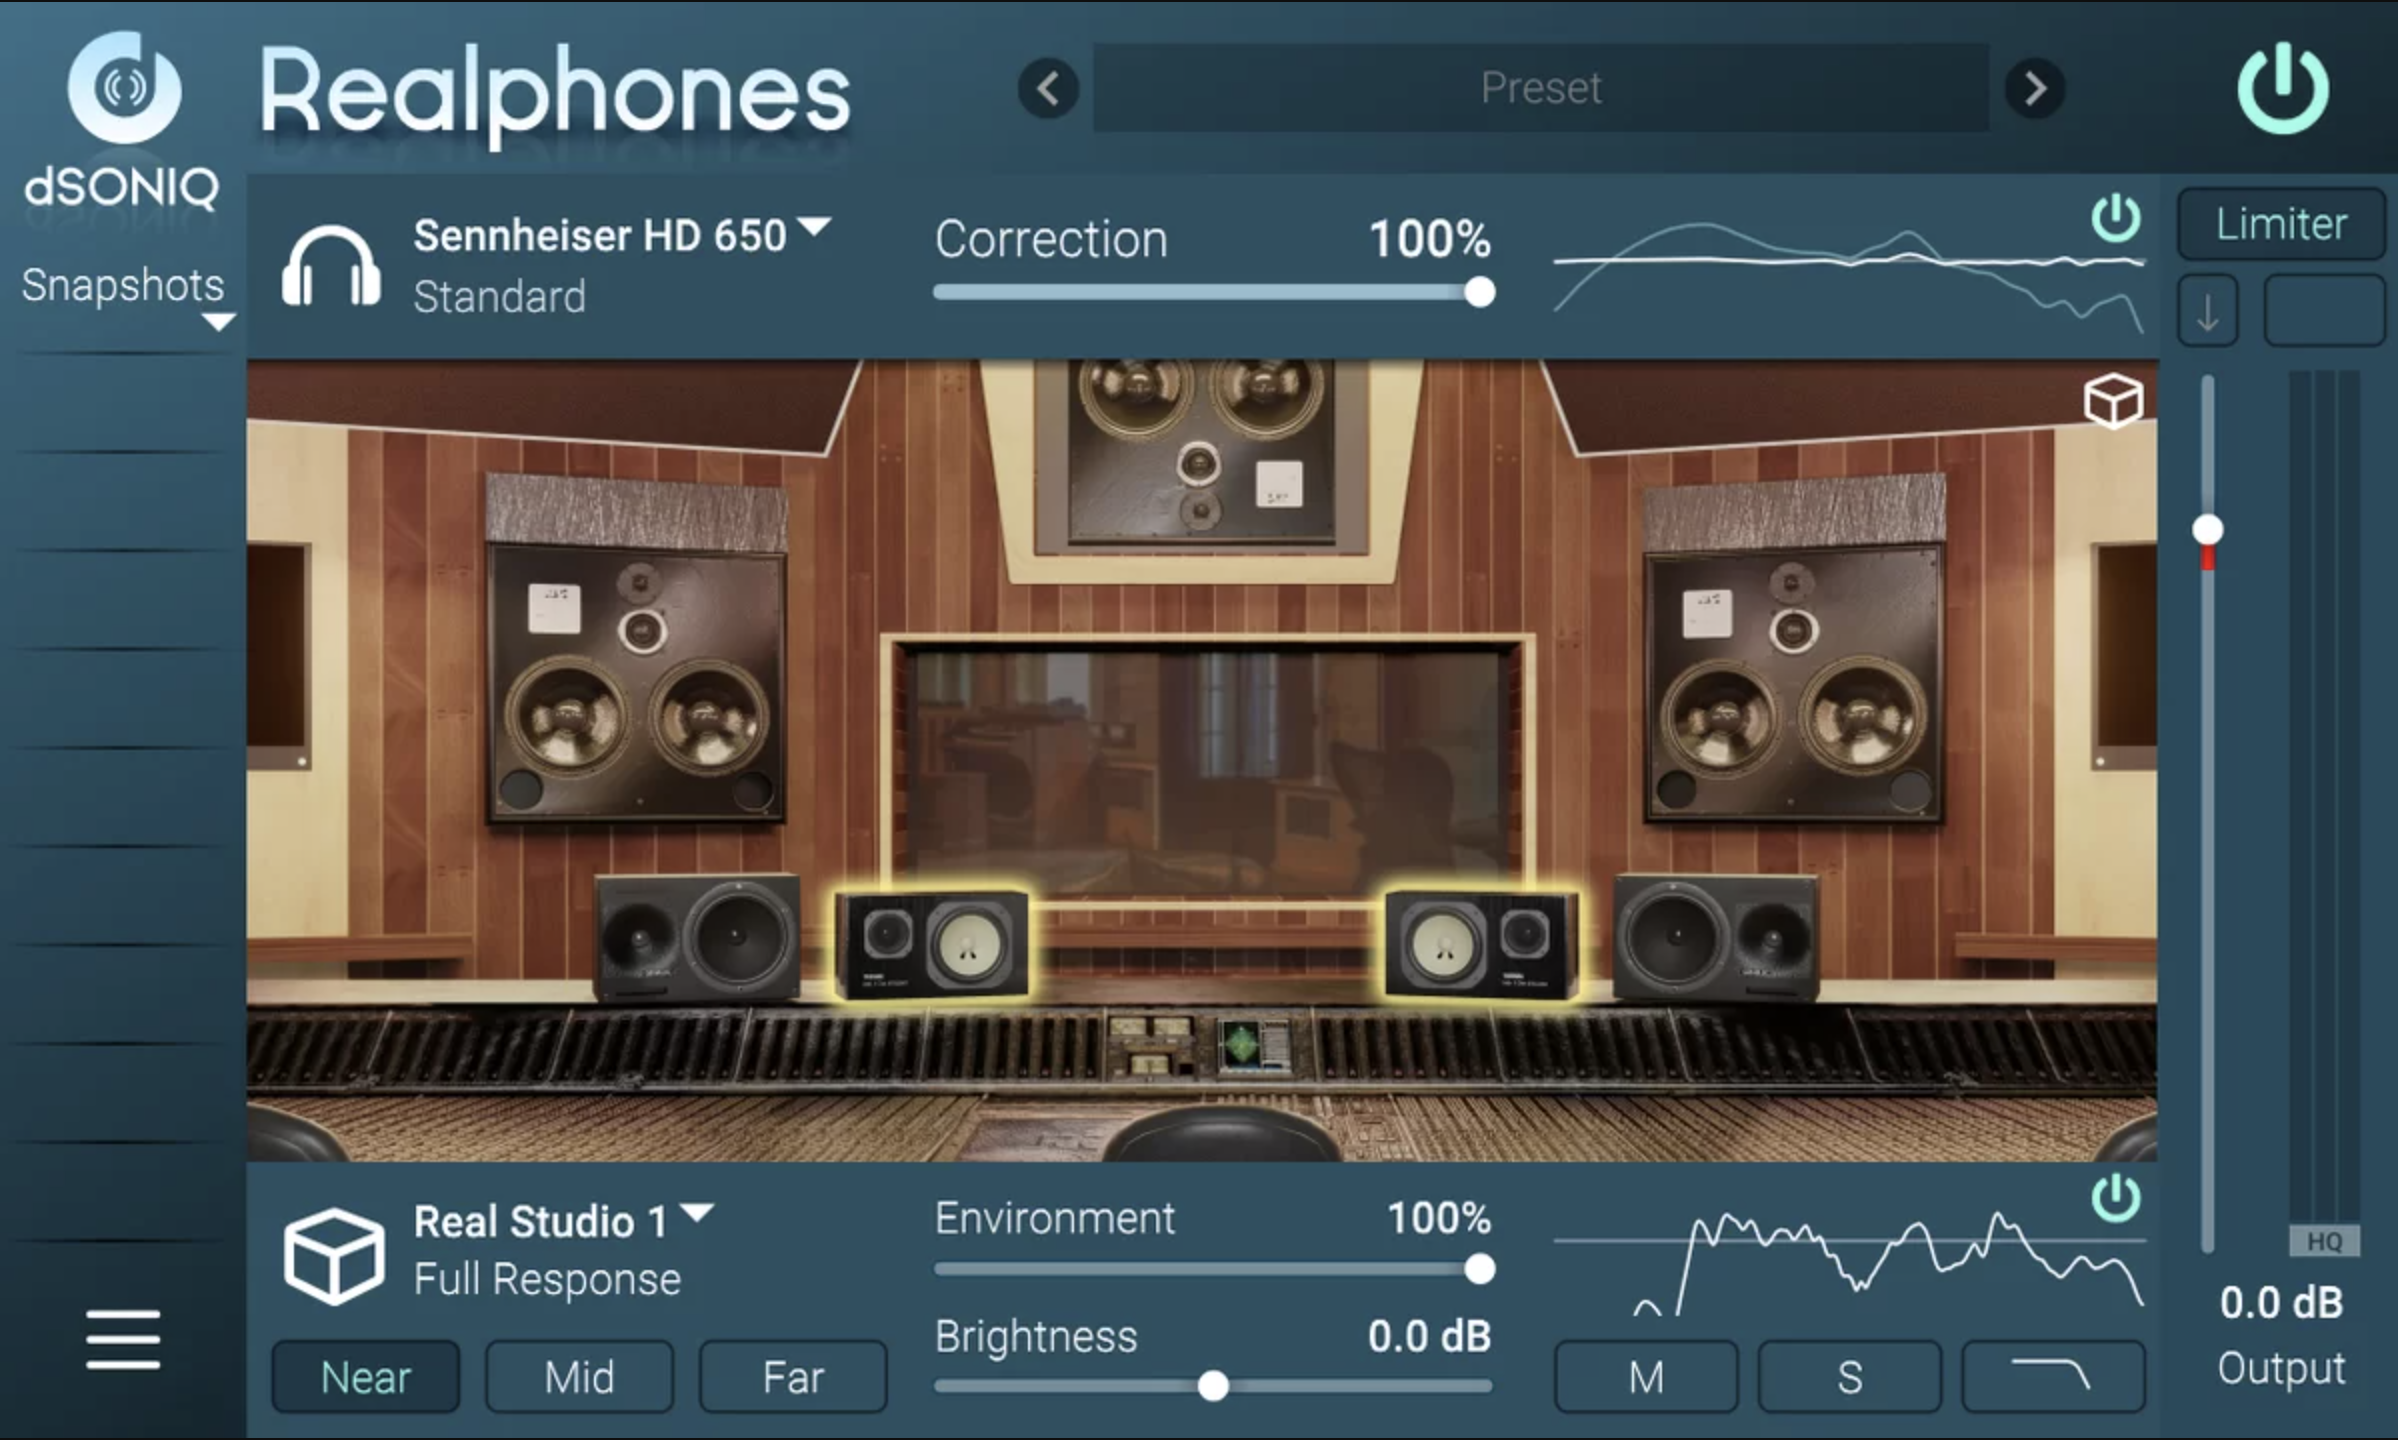
Realphones by dSONIQ (Headphone Monitoring Tool)
The Realphones app/plugin makes your headphone audio sound like it’s coming through the expensive monitoring system of a high end recording studio control room. Some folks feel this can be useful with regard to producing good mixes. Others disagree.
*NOTE: *In my opinion* apps/plugins like Realphones (or Sonarworks, Waves Abbey Road Studio 3, Acustica Sienna, etc.) aren’t necessary for producing good podcast audio using headphones (studio monitors are a different story), but they can be useful for some folks. Remember, it’s always perfectly fine to simply get accustomed to your particular headphones over time and rely on them without the use of software like this.
I haven’t tried Realphones yet (Pricing: $69-$179 for different options).
Here’s a good review video I found with lots more info and sound examples: Is REALPHONES 1.8 really better than Sonarworks & Acustica Sienna for mixing on headphones?
From the Realphones website:
- A professional studio control room in your headphones.
- Modeling the sound of various models of professional monitors and consumer audio speakers, Check how your mix behaves under different listening conditions.
- Night club and car cabin for mix-checking.
What are you thoughts? Comment below.
Want to receive the Daily Goody in your email, daily or weekly? Subscribe free here.
And please keep in mind, the Daily Goody is only a tiny little tip, fact or lesson everyday. Please don’t expect any of these posts to be long, earth-shattering masterpieces that instantly answer every single question you can think of and completely transform you into a world class podcast engineer. “Little by little, a little becomes a lot.”
-
Two Voices Set to Equal LUFS Levels Doesn’t Guarantee Identical Perceived Loudness Levels
There are many apps that can be used to loudness normalize an audio file to a specific LUFS loudness level. Many podcasters and producers use this process to equalize the volume level of each participant in podcast episodes.
In most cases this works well; all the voices set to the same LUFS level will be almost the same exact perceived loudness level compared to each other, which provides a good mix and allows the listeners to hear each participant equally.
But many times, probably half the time (or more?), even though each voice is set to the same LUFS level they won’t sound like they’re at the same loudness level – your ears will perceive that one voice is noticeably louder than another, and vice versa. This is due to many factors including each audio files EQ curve, each participants proximity to the microphone when recording, how dynamic each participant is, how much compression is being used on each, and more.
The moral of the story: Always use your ears as the final judge in all phases of audio production. Period.
It’s totally fine to use LUFS loudness normalization or/or auto-leveling, just be sure to use your EARS to make the final evaluation on volume levels in your mix.
What is your experience with LUFS leveling?
Want to receive the Daily Goody in your email, daily or weekly? Subscribe free here.
And please keep in mind, the Daily Goody is only a tiny little tip, fact or lesson everyday. Please don’t expect any of these posts to be long, earth-shattering masterpieces that instantly answer every single question you can think of and completely transform you into a world class podcast engineer. “Little by little, a little becomes a lot.”
-
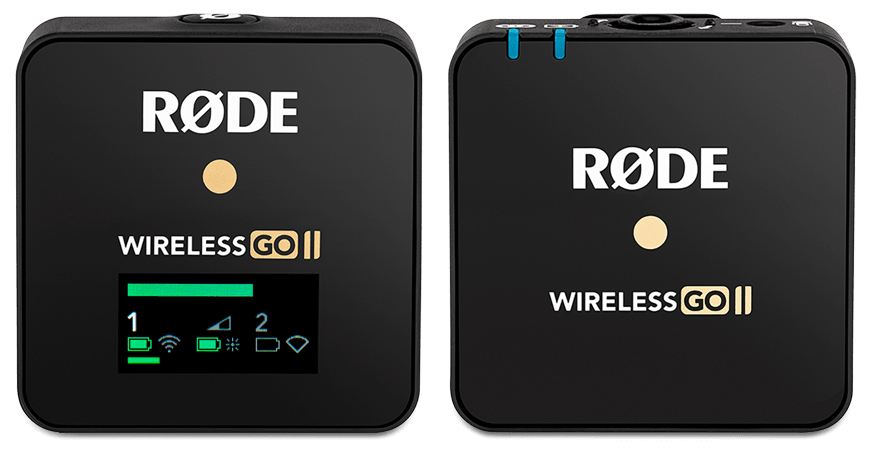
RØDE Wireless GO II (Wireless Transmitter and Recorder)
I’ve heard good things about the RODE Wireless GO II. It’s a wireless transmitter AND recorder in one. And it doesn’t require any cables like a clip-on lavalier microphone does. You clip it on to your clothing as close to your mouth as you can manage and it will pick up your voice well. It can record on the device itself in addition to sending the audio wirelessly to the receiver which you then record in your computer, camera, etc.
Someone recently asked me to recommend a good wireless setup for someone making videos doing stretching and exercises. Basically there are 3 options here:
- Wear the RØDE Wireless GO II or similar.
- Wear a wireless transmitter (around same size as the GO) along with connected lavalier microphone clipped to the collar.
- Wear some kind of headset with microphone that has a transmitter built into it. (Does that even exist?? — but wait — AIRPODS! FYI, the audio quality of AirPods is horrendous; I don’t recommend using or capturing AirPods audio anytime anywhere.)
Have you used the RODE Wireless GO II? Comment below.
Want to receive the Daily Goody in your email, daily or weekly? Subscribe free here.
And please keep in mind, the Daily Goody is only a tiny little tip, fact or lesson everyday. Please don’t expect any of these posts to be long, earth-shattering masterpieces that instantly answer every single question you can think of and completely transform you into a world class podcast engineer. “Little by little, a little becomes a lot.”