Your cart is currently empty!
Author: Chris Curran
-
“Firing” a Podcast Production Client
Sometimes when you’re producing or editing a client’s podcast the relationship starts out really well — expectations are clear, preset boundaries are respected, both parties perform their pre-determined responsibilities in a timely manner, and things go smoothly.
But somewhere along the way your client may start demanding more from you — thrusting some of their own pre-determined responsibilities onto you, introducing new tasks and production that were never part of the agreement (known as Scope Creep), delivering audio to you last minute and expecting you to drop everything to produce and publish the episode immediately, or asking you to pick up the slack last minute because they neglected to plan ahead properly, etc.
I’ve had several relationships crumble in this manner and I’ve never been hesitant to end the relationship.
As a podcast producer/editor you have no obligation to indulge a clients poor planning, laziness, and disrespectful behavior at the expense of your time and sanity. ZERO OBLIGATION. Don’t do it. There are many other fish in the sea.
And if the client perceives you as a “bad” person for ending the relationship, so be it. If they’re not intelligent/aware enough to understand how egregiously they violated what they agreed to, then nothing you can say will get through to them. Just let them go.
Have you experienced this?
Want to receive the Daily Goody in your email, daily or weekly? Subscribe free here.
And please keep in mind, the Daily Goody is only a tiny little tip, fact or lesson everyday. Please don’t expect any of these posts to be long, earth-shattering masterpieces that instantly answer every single question you can think of and completely transform you into a world class podcast engineer. “Little by little, a little becomes a lot.”
-
How Do You Set Your Final Episode LUFS Level to -16 Stereo or -19 Mono?
I use iZotope RX to set all the episodes I produce to either -19 Mono or -16 Stereo.
How do you accomplish this task?
Some folks use Auphonic; others simply eyeball the meters in their DAW. There are no doubt many other ways.
If you’d like to share your method in the comments we would all be very grateful!
Want to receive the Daily Goody in your email, daily or weekly? Subscribe free here.
And please keep in mind, the Daily Goody is only a tiny little tip, fact or lesson everyday. Please don’t expect any of these posts to be long, earth-shattering masterpieces that instantly answer every single question you can think of and completely transform you into a world class podcast engineer. “Little by little, a little becomes a lot.”
-
The Dreaded “Andumm” (Sounds like Ann Dumb)
When someone slurs together the words ‘and’ and ‘umm’ (so it sounds like Ann Dumb) it’s nearly impossible to remove the ‘umm’ and still have the resulting ‘and’ sound natural. Actually, there are several good tricks to do this type of edit but they all typically take a significant amount of time – and it’s still not guaranteed that the resulting edit will sound good in the end. That’s why I ignore each and every “Andumm.”
Of course you could try to find some other audio of the person saying “and” cleanly, and then use that “and” in place of the “Andumm.” But even that is not guaranteed to sound natural due to possible differences in tone, intensity and microphone proximity, etc.
How do you handle “Andumm” in the editing process?
Want to receive the Daily Goody in your email, daily or weekly? Subscribe free here.
And please keep in mind, the Daily Goody is only a tiny little tip, fact or lesson everyday. Please don’t expect any of these posts to be long, earth-shattering masterpieces that instantly answer every single question you can think of and completely transform you into a world class podcast engineer. “Little by little, a little becomes a lot.”
-
Bringing Down a De-esser’s Lower Range To Start Around 3-4 kHz if Necessary
De-essers are used to reduce sibilance, usually in the 5-8 kHz range where sibilance is typically most prevalent. But sometimes a recording will contain harsh, irritating frequencies starting around the 3-4 kHz range and from there extend up to the common range stated above, 5-8 kHz. In cases like these it helps to de-ess the entire range from around 3-4 kHz all the way up to 7-8 kHz or higher if needed.
If you’ve ever applied a de-esser and still thought the audio sounded harsh, it’s probably due to harsh frequencies in that 3-4-5 kHz range.
*Be careful, though — if you remove too much information in the 3-4 kHz range the audio can start to sound a bit dull, unclear or muffled. (not crisp) …and that’s not good either. As always, you have to find that happy medium 😉
Have you de-essed audio down that low? (3-4 kHz)
Want to receive the Daily Goody in your email, daily or weekly? Subscribe free here.
And please keep in mind, the Daily Goody is only a tiny little tip, fact or lesson everyday. Please don’t expect any of these posts to be long, earth-shattering masterpieces that instantly answer every single question you can think of and completely transform you into a world class podcast engineer. “Little by little, a little becomes a lot.”
-

Goody Bag, plus RE20 Vintage vs New – PES 216
I overview 9 recent Daily Goody‘s from Dec. 4 – Dec. 23 (see list below). You can sign up to receive Daily Goody’s in your email every day or a weekly roundup. Sign up here.
*AND you’ll hear my first ever comparison between my vintage RE20 vs my new RE20. They sound ALMOST identical 😉
Daily Goody posts that I discussed in this episode:
- Where Do You Edit – in the Multitrack Session, or the Mixdown File, or Both?
- Using Photopea.com To Create Episode Artwork for Free
- Fletcher-Munson Curves
- Zoom F2 Field Recorder
- THS-MDM Microphone Decoupler
- My Recent Plugin Purchases (Black Friday/Holidays)
- The Audio Quality of Apple AirPods’ Microphone
- Major Changes to RINGR
- Low Level Compression
Other Notes:
- If you ever have questions please reach out!
- The start date for the next PES semester is June 29, 2021
- If you’d like to share this show with any of your podcaster friends, feel free to send them a message saying, “Btw, here’s a show about podcast audio production you may find helpful” with this link: https://podcastengineeringschool.com/subscribe/
Let me know if you have any questions or need any help with anything,
~Chris -
Recording Interviews at an Organizations Annual Conference
It’s a smart move for organizations who have a podcast to take advantage of the fact that many of their key members will attend their annual conference each year. This can make it easy to arrange in-person interviews and record many conversations to be published in the weeks and months after the conference.
Interviews can be recorded in a private room away from the hustle and bustle of the event, and they can also be recorded in front of a Live audience which can be a pretty cool “event” to offer attendees.
I’ve done this many times and it’s a great way to capture good content from multiple key members.
Have you ever done this?
Want to receive the Daily Goody in your email, daily or weekly? Subscribe free here.
And please keep in mind, the Daily Goody is only a tiny little tip, fact or lesson everyday. Please don’t expect any of these posts to be long, earth-shattering masterpieces that instantly answer every single question you can think of and completely transform you into a world class podcast engineer. “Little by little, a little becomes a lot.”
-
Mailing Microphones to Podcast Guests
To ensure good quality audio from their guests, some podcast hosts/shows actually mail each guest a microphone or headset to use during recording. This strategy solves some issues but can create additional issues. And the host still has to do a full soundcheck on each and every guest.
Pros:
- The guest doesn’t have to own or buy a microphone
- The guests audio recording will sound good (as long as their computer’s settings are set correctly)
Cons:
- Helping each guest set up the microphone properly and adjust their computers audio settings can sometimes be a major task
- What about a stand for the microphone? Will the host/show ship this as well?
- If the guest is in a bad sounding room then their audio will not sound great even with a good microphone
- The host/show will have to keep careful notes about who has their microphone(s) and if/when they have been shipped and received, etc.
- The guest will have to go through the trouble of mailing the microphone back to the host/show
- Shipping costs
- Audio equipment can be damaged in the shipping process
I’ve never mailed microphones to guests but I know some people who do.
Have you ever done this? Have your results been good?
Can you add any more pros or cons in the comments?
Want to receive the Daily Goody in your email, daily or weekly? Subscribe free here.
And please keep in mind, the Daily Goody is only a tiny little tip, fact or lesson everyday. Please don’t expect any of these posts to be long, earth-shattering masterpieces that instantly answer every single question you can think of and completely transform you into a world class podcast engineer. “Little by little, a little becomes a lot.”
-

AMEK EQ 200
The AMEK EQ 200 plugin is an amazing and expensive EQ from Plugin Alliance! It retails for $399 and to my ears it sounds extremely transparent and smooth. It has many handy features including Auto Listen which “solo’s” the frequency band you’re adjusting so that you can hear exactly what you’re adjusting.
From their website:
Based on the first parametric equalizers that started it all, the AMEK EQ 200 is a beautifully transparent plugin EQ, inspired by the classic sound of icons like the GML 8200 and vintage SONTEC EQs.
Features:
- 5 wide overlapping fully-parametric EQ bands
- Additional High and Low pass filters, and Low and High shelving EQs
- 15dB or 7dB switchable boost or cut for each band
- Modeled after the brilliant, precise and beautiful sound of legendary EQs, like the GML 8200 and vintage SONTEC EQs
- Includes Brainworx signature plugin-only enhancements, including TMT modeling (US Patent No. 10,725,727), variable THD control, M/S processing, Mono-Maker mode, Auto Listen and more
- Scalable UI to adapt to your screen size and workflow
- Loaded with plenty of useful presets to give you a starting place for finding your sound, including presets from legendary mastering engineer Howie Weinberg (LA)
I’ve been so impressed by this plugin that I bought it when it went on sale for $199
Have you tried it yet? You can try it for free.
Want to receive the Daily Goody in your email, daily or weekly? Subscribe free here.
And please keep in mind, the Daily Goody is only a tiny little tip, fact or lesson everyday. Please don’t expect any of these posts to be long, earth-shattering masterpieces that instantly answer every single question you can think of and completely transform you into a world class podcast engineer. “Little by little, a little becomes a lot.”
-

Let Your Hardware Breathe
Look closely at the image above.
On the bottom is my channel strip (Neve Portico II). On top are my Sound Devices MixPre-6 (top left) and my monitor controller (top right).
Notice that there’s a big gap of air between the gear on top and the gear on bottom. The monitor controller has built-in feet which raise it about a half inch above whatever it’s sitting on, and for the MixPre I put little rubber feet underneath its stand to raise it about 3/4″ above the Neve below.
The gap of air between the gear allows heat to escape from all 3 pieces of gear. If the top 2 pieces of gear were resting directly on the Neve below the heat would have no way to vent, which would significantly raise the temperature of all 3 pieces of gear.
Making sure gear doesn’t overheat will extend its lifespan considerably.
Want to receive the Daily Goody in your email, daily or weekly? Subscribe free here.
And please keep in mind, the Daily Goody is only a tiny little tip, fact or lesson everyday. Please don’t expect any of these posts to be long, earth-shattering masterpieces that instantly answer every single question you can think of and completely transform you into a world class podcast engineer. “Little by little, a little becomes a lot.”
-

My Dream Microphone for Recording At Live Events
The Yellowtec iXm with PREMIUM Head (beyerdynamic) Cardioid — which records audio right inside the microphone itself!!! So basically you can walk around with this microphone and record audio without needing a separate recorder.
The only reason I haven’t bought this microphone yet is because it costs around $1,200 and I wouldn’t actually use it that often, but I heard their Premium heads sound amazing.
They do make an iXm Podcaster but its specs aren’t as good as the one I dream about.
From their website:
- Thanks to its onboard LEA DSP Engine, the iXm Recording Microphone is the number one device to capture best quality interviews with perfect audio levels at the push of a button. Interchangeable microphone capsules give you the flexibility to choose a pickup pattern according to specific recording conditions.
- The iXm with beyerdynamic’s PREMIUM head with cardioid recording pattern as a directed head is designed for recordings in environments with various noise levels. Thus, it can be called an all-purpose answer for reporters. Because of its sound pickup from the front, it filters background noise and ensures crystal clear recordings through excellent and natural frequency response. The cardioid pickup pattern suits best for interviews in various surroundings like events and outdoor locations with a lot of traffic noise. Using the head, there is no common proximity effect of directed microphones due to the high-pass-filter that is found inside the iXm recorder’s LEA Engine. LEA achieves a perfect balance of frequency ranges.
- As an electret microphone head, the head is created to capture smallest sound pressure levels. Thus, its recording pattern is more sensitive in higher frequency ranges which results in a higher resolved pattern in the end zone compared to a dynamic microphone head.
Who knows, maybe someday I’ll buy it and use it 🙂 …maybe if someone ever buys my first ever NFT fractal artwork 😉
Want to receive the Daily Goody in your email, daily or weekly? Subscribe free here.
And please keep in mind, the Daily Goody is only a tiny little tip, fact or lesson everyday. Please don’t expect any of these posts to be long, earth-shattering masterpieces that instantly answer every single question you can think of and completely transform you into a world class podcast engineer. “Little by little, a little becomes a lot.”
-
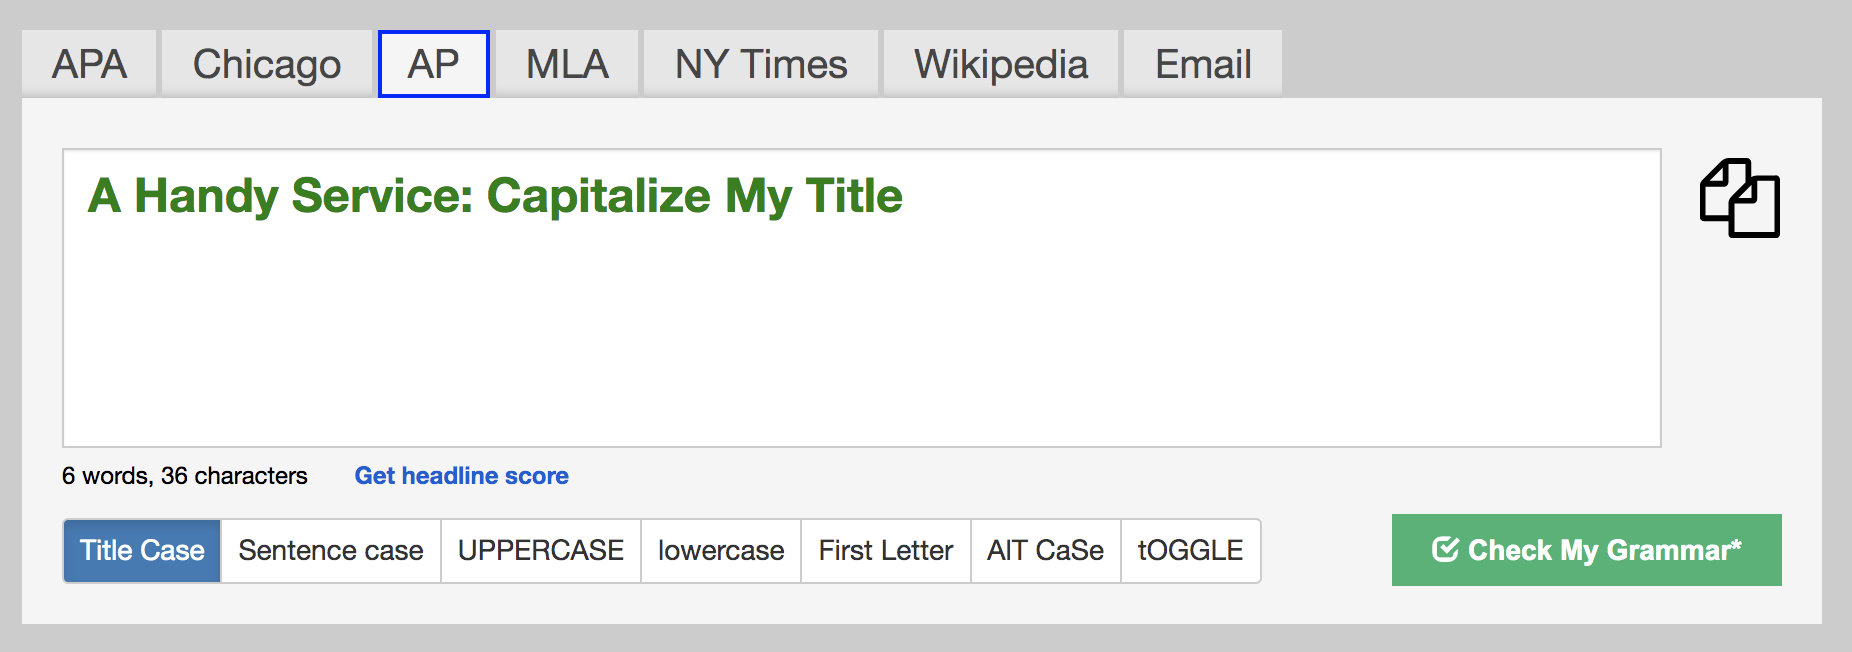
A Handy Service: Capitalize My Title
When I title my episodes and blog posts (and anything else, really) I use a handy web-based tool called Capitalize My Title.
It’s simple to use: You paste your title into a box and the tool immediately capitalizes your title as per the format you specify. Then you copy the newly capitalized text and paste it wherever you want.
I like it because personally I’m not always sure of the rules of capitalization, etc.
Have you tried this or any other tool like it?
Want to receive the Daily Goody in your email, daily or weekly? Subscribe free here.
And please keep in mind, the Daily Goody is only a tiny little tip, fact or lesson everyday. Please don’t expect any of these posts to be long, earth-shattering masterpieces that instantly answer every single question you can think of and completely transform you into a world class podcast engineer. “Little by little, a little becomes a lot.”
-

Matt Powell, Senior Audio Engineer for Mission.org – PES 215
My guest is Matt Powell, Senior Audio Engineer for Mission.org (Website, Twitter @missionhq, LinkedIn)
We discussed SO MUCH, including:
- Editing philosophy
- Shure SM58
- PreSonus Eureka Channel Strip
- Focusrite Scarlett 2i2
- Macbook Pro
- Adobe Audition (parametric EQ, notch filters, )
- iZotope RX7 (de-noise, EQ, compression, )
- Waves Platinum bundle and SSL G Channel strip plugin
- SM7b > Cloudlifter > Compressor > Ableton
- Blue Yeti
- Hosts recording locally with Quicktime
- Sennheiser e835
- Using Zoom for every interview
- Remove noise first before EQ, compression, etc.
Thanks for being a great guest, Matt!
All are welcome to comment below.
-
When Your Client Saves Money by Producing Some Episodes Themselves
This has happened to me in the past and I totally understand if a client wants to save some money this way.
If you review the quality of their audio production you may spot some audio mistakes and issues including:
- Different voices being different volumes
- Voices not being EQ’d well, if at all
- Editing out sections of a voice which already had music underneath it so the music “skips” whenever there’s an edit
- Music fades being abrupt, jarring and/or misplaced
- Edits that sound very unnatural because they weren’t cleanly made
These sound like small issues but they add up to creating a listening experience which is sometimes not good.
I offered to help one client improve her skills and she seemed open to it but never took me up on my offer.
Do any of your clients do this type of thing?
Want to receive the Daily Goody in your email, daily or weekly? Subscribe free here.
And please keep in mind, the Daily Goody is only a tiny little tip, fact or lesson everyday. Please don’t expect any of these posts to be long, earth-shattering masterpieces that instantly answer every single question you can think of and completely transform you into a world class podcast engineer. “Little by little, a little becomes a lot.”
-
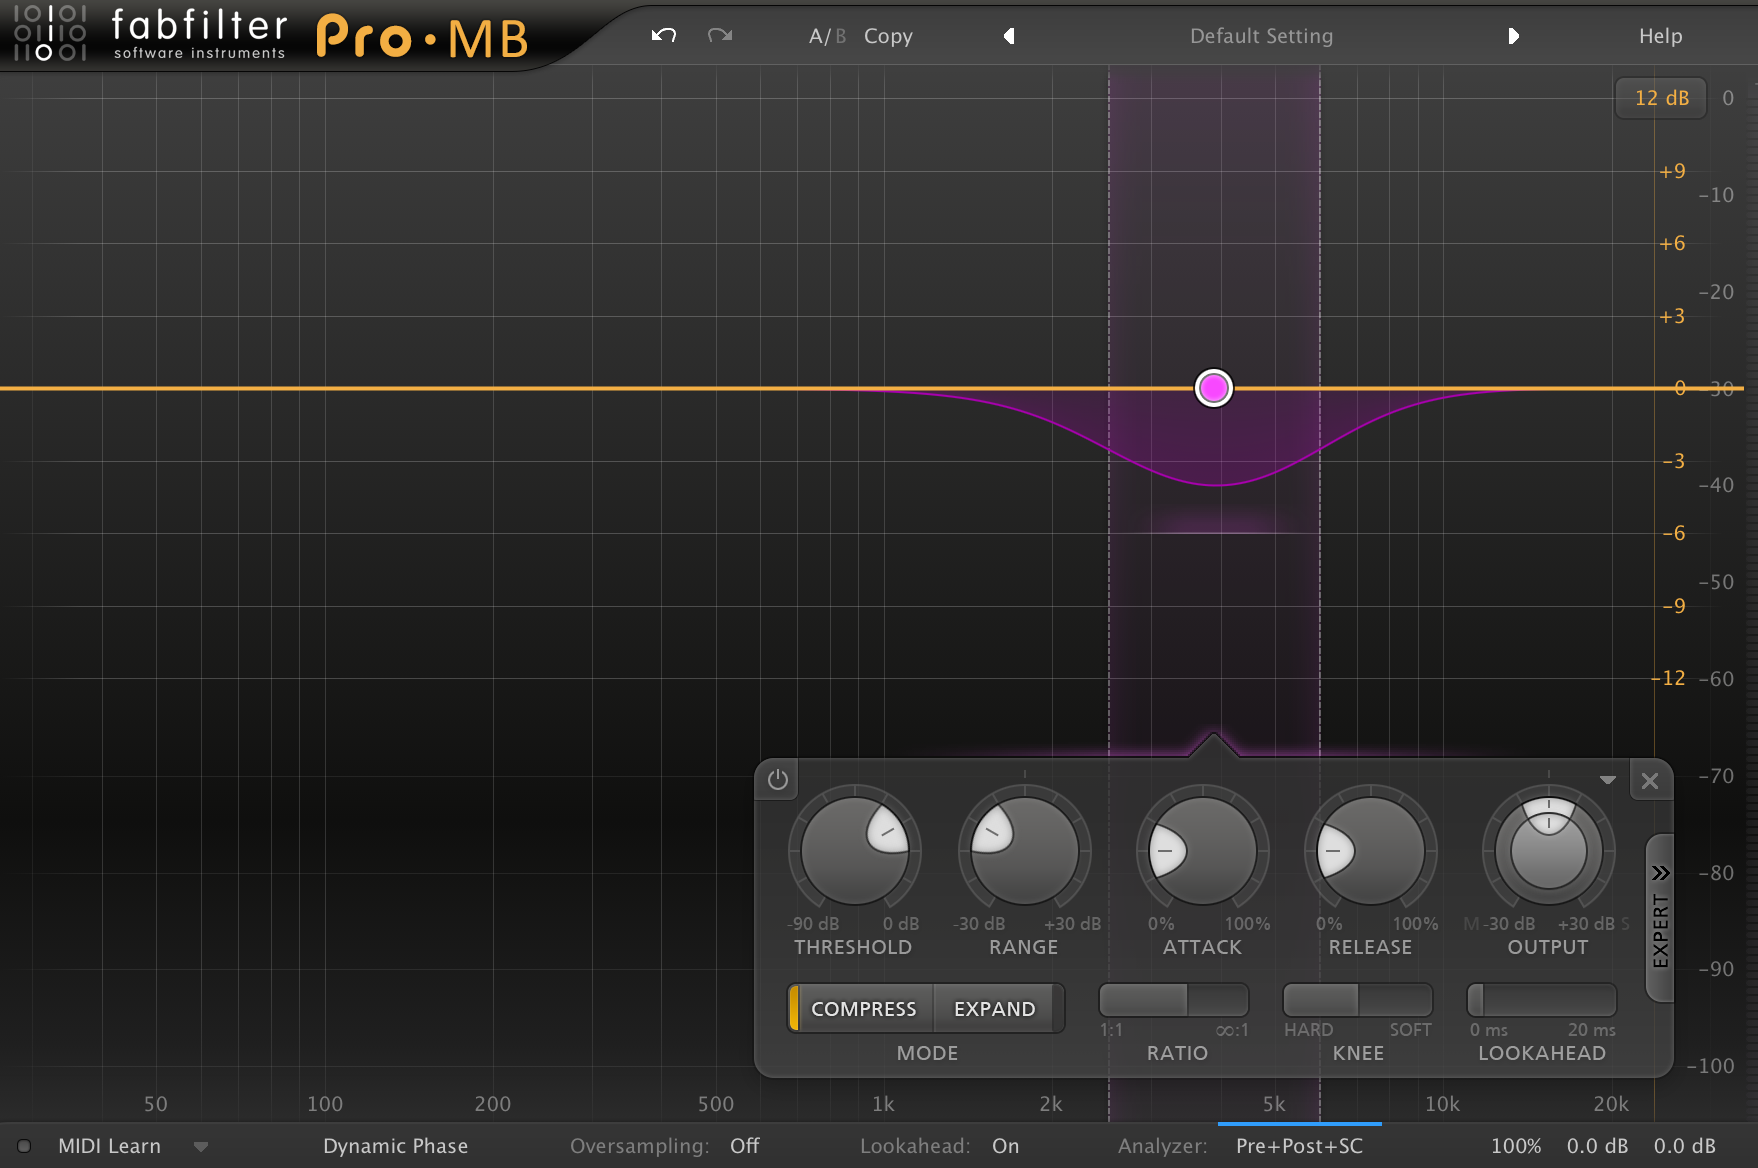
Using a Multiband Compressor on a Track Containing 2+ Participants
When two or more voices are recorded on the same track and one voice is too prominent in a certain frequency range, a multiband compressor can do a really good job of taming those frequencies while not affecting other frequency ranges.
For example, let’s say one of the voices is, at times, very sharp and piercing in the 3-5 kHz range (the pain zone!). You could set up a compressor frequency band around 3-5 kHz (see included image) and set the threshold so that the piercing frequencies are pushed down in volume and are no longer piercing/annoying.
Same applies for all other frequency ranges — midrange, low-mids and even high frequencies.
One time I used a band from 15-24 kHz (really high!) to bring down the very high end of one participant who had lots more information up in that range. It worked like a charm 😉
Have you ever processed audio this way before?
Want to receive the Daily Goody in your email, daily or weekly? Subscribe free here.
And please keep in mind, the Daily Goody is only a tiny little tip, fact or lesson everyday. Please don’t expect any of these posts to be long, earth-shattering masterpieces that instantly answer every single question you can think of and completely transform you into a world class podcast engineer. “Little by little, a little becomes a lot.”
-
Instead of Deleting Umms You Could…
Silence them! It’s as easy as highlighting the umm and then silencing or muting that selection. Then, to ensure that the silent space is not too long or awkward-sounding, you could delete about half of that silent space.
*Beware: If the audio you’re editing has significant background noise, creating a small space of silence may stick out like a sore thumb and actually be more distracting than a regular umm. In such cases you may want to simply delete the umm, or replace the umm with some “room tone.”
Want to receive the Daily Goody in your email, daily or weekly? Subscribe free here.
And please keep in mind, the Daily Goody is only a tiny little tip, fact or lesson everyday. Please don’t expect any of these posts to be long, earth-shattering masterpieces that instantly answer every single question you can think of and completely transform you into a world class podcast engineer. “Little by little, a little becomes a lot.”
-

RE320 vs. RE20 – PES 214
Note: In this episode I switch back and forth between using the Electro-Voice RE320 and the Electro-Voice RE20 microphones.
The RE320 vs. RE20
- I own both these microphones and I like them very much.
- Which one do you think sounded better on my voice?…? Hmmm….?
- The audio in this episode is completely raw (unprocessed) but I did match the microphones’ levels in post-production – *except for the end of the episode when I show you the difference in level between both raw recordings.
Other Notes:
- If you ever have questions please reach out!
- The start date for the next PES semester is April 20, 2021
- If you’d like to share this show with any of your podcaster friends, feel free to send them a message saying, “Btw, here’s a show about podcast audio production you may find helpful” with this link: https://podcastengineeringschool.com/subscribe/
Let me know if you have any questions or need any help with anything,
~ChrisComment below with any questions!
-

Shadow Hills Mastering Compressor Class A
In my opinion this is one of the best compressors in the world and I love using it! Actually it’s two separate compressors in one plugin; it contains Optical and Discrete compression sections for two-stage compression techniques.
The Shadow Hills Mastering Compressor Class A is available exclusively via Plugin Alliance.
Features:
- Exacting emulation of the original Class A limited edition of the Shadow Hills Mastering Compressor, endorsed by Shadow Hills Industries.
- Class-A discrete compressor section
- Separate Optical and Discrete compression sections for two-stage compression techniques.
- Switchable Output Transformers – Nickel, which adds a nice top – end sparkle. Iron, which adds a little character in the mid’s, and Steel which adds additional harmonic distortion.
- Brainworx Plugin Only Features added to the additional panel: Brainworx´s TMT (US Patent No. 10,725,727), Headroom, M/S Processing, Mono-Maker, Stereo Width, Parallel Mix, Sidechain Filter, External Sidechain, Scalable User Interface.
This plugin is usually quite expensive but if you ever see it on sale you may want to treat yourself 😉
Want to receive the Daily Goody in your email, daily or weekly? Subscribe free here.
And please keep in mind, the Daily Goody is only a tiny little tip, fact or lesson everyday. Please don’t expect any of these posts to be long, earth-shattering masterpieces that instantly answer every single question you can think of and completely transform you into a world class podcast engineer. “Little by little, a little becomes a lot.”
-
Be Aware: Using Echo-Cancellation Degrades Audio Quality
Many online recording services (Squadcast, Zencastr, Riverside.fm, etc.) have a feature called echo-cancellation which users should enabled if/when any participants are NOT wearing headphones. Without this kind of echo-cancellation you will hear participants voices echoing back and forth which makes a conversation virtually impossible. And unfortunately with echo-cancellation enabled there are ducking/muting issues when people talk over each other, which is very annoying and literally disrupts the conversation. But, if someone doesn’t have earbuds or headphones you are FORCED to use echo-cancellation.
In a recent episode I produced for a client I clearly noticed the audio degradation caused by the echo-cancellation. This was the first time we had to use echo-cancellation with this particular client and afterwards I noticed that the recordings sounded quite a bit worse than usual. In previous episodes (without echo-cancellation) the host sounded very clear, but in this episode (with echo-cancellation) he sounded quite midrangy, dull and not very clear in the high frequencies.
I compensated for those deficiencies in post-production but of course you can never make a bad sounding recording sound AS good as a high quality recording.
What about you — have you noticed this type of audio quality degradation?
Want to receive the Daily Goody in your email, daily or weekly? Subscribe free here.
And please keep in mind, the Daily Goody is only a tiny little tip, fact or lesson everyday. Please don’t expect any of these posts to be long, earth-shattering masterpieces that instantly answer every single question you can think of and completely transform you into a world class podcast engineer. “Little by little, a little becomes a lot.”
-
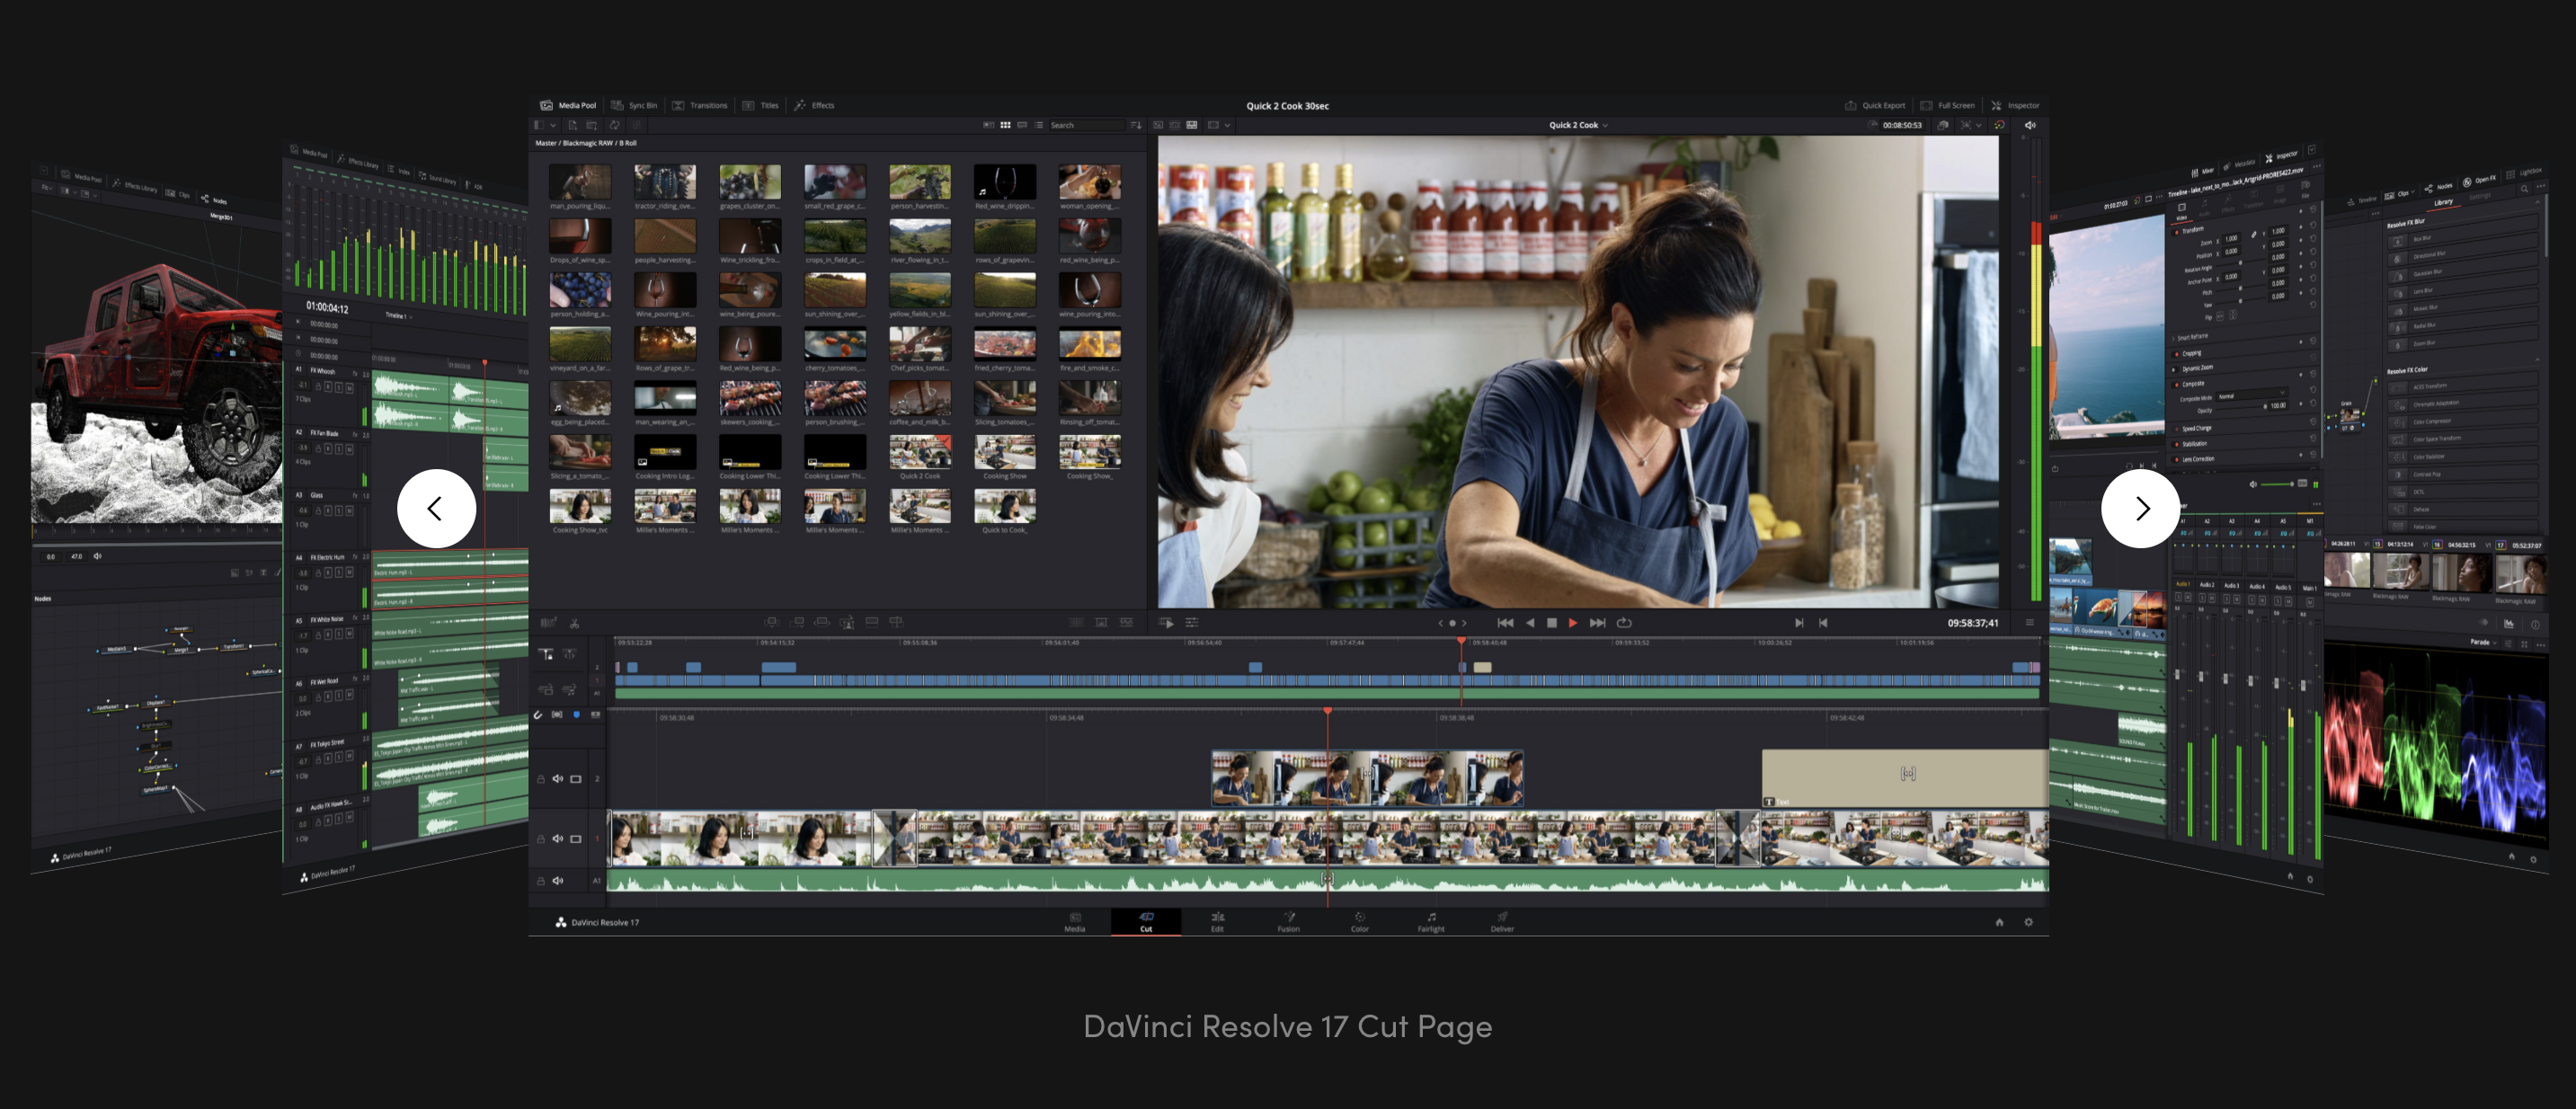
DaVinci Resolve
I have not tried it but DaVinci Resolve bills itself as “Hollywood’s #1 Post Solution.”
From their website: DaVinci Resolve is the world’s only solution that combines editing, color correction, visual effects, motion graphics and audio post production all in one software tool! Its elegant, modern interface is fast to learn and easy enough for new users, yet powerful for professionals. DaVinci Resolve lets you work faster and at a higher quality because you don’t have to learn multiple apps or switch software for different tasks. That means you can work with camera original quality images throughout the entire process. It’s like having your own post production studio in a single app! Best of all, by learning DaVinci Resolve, you’re learning how to use the exact same tools used by Hollywood professionals!
Have you tried DaVinci Resolve?
Want to receive the Daily Goody in your email, daily or weekly? Subscribe free here.
And please keep in mind, the Daily Goody is only a tiny little tip, fact or lesson everyday. Please don’t expect any of these posts to be long, earth-shattering masterpieces that instantly answer every single question you can think of and completely transform you into a world class podcast engineer. “Little by little, a little becomes a lot.”